.webp)
Overview: Diagnosing and Repairing Hydraulic Leaks
Meta Description: Learn how to fix a leaking forklift tilt cylinder with our detailed seal replacement guide. Includes diagnosis techniques, seal types, step-by-step repair procedures, and preventive maintenance tips.
A leaking forklift tilt cylinder represents one of the most common maintenance issues affecting warehouse and industrial material handling operations. Hydraulic fluid leaks compromise system performance, create safety hazards, and waste expensive hydraulic fluid. Rather than replacing an entire cylinder, most external leaks can be permanently resolved through professional seal replacement—a cost-effective repair that restores cylinder functionality for years of continued service.
Understanding the anatomy of a tilt cylinder leak, diagnosing the leak source, and executing proper seal replacement procedures are essential skills for maintenance technicians and fleet managers. This comprehensive guide walks through leak diagnosis, disassembly procedures, seal identification, and step-by-step installation of replacement seals that restore your cylinder to factory specifications.
Whether you handle repairs in-house or coordinate with external service providers, knowing how to diagnose and repair leaking cylinders reduces equipment downtime, extends asset lifespan, and improves your bottom line through preventive maintenance planning.
Identifying Leak Sources: Where Hydraulic Fluid Escapes
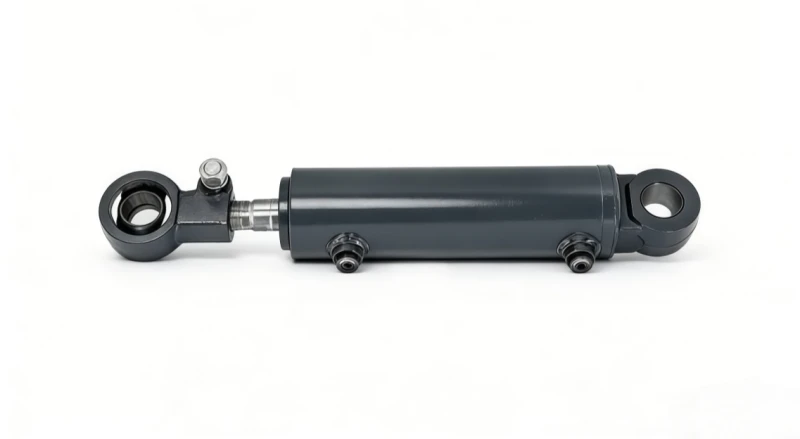
Before attempting repairs, accurately identify where hydraulic fluid is leaking from. A tilt cylinder leak can originate from multiple locations, each requiring different repair approaches. Misdiagnosing the leak source wastes time and resources while leaving the underlying problem unresolved.
Common Leak Locations and Their Indicators
Rod Gland Leaks (Most Common)
The rod gland—where the piston rod exits the cylinder barrel—is the most frequent leak source. Oil seeping or dripping from this location indicates piston rod seal degradation. Rod gland leaks are typically caused by age-related seal hardening, contaminated hydraulic fluid, or prolonged rod exposure to dust and debris. Characteristics include visible oil accumulation around the rod seal area and oil traces along the extended rod.
Port Connection Leaks
Hydraulic fluid leaking from inlet or outlet ports indicates loose hose connections or damaged port seals. These leaks produce rapid dripping at the connection point and are often accompanied by audible hissing under system pressure. Port leaks typically resolve through hose retightening, but persistent leaks may indicate internal port threads are damaged.
Cylinder Base/End Cap Leaks
Leaks appearing at the cylinder end cap or barrel base indicate internal piston seal failure. These internal leaks are more serious than external rod gland leaks because internal pressure bypasses the piston, causing loss of directional control and system pressure. Equipment exhibiting sluggish tilt operation accompanied by oil at the cap end may indicate internal piston seal failure.
Leak diagnosis checklist:
- Visual Inspection: Position a bright work light and carefully observe the cylinder during operation. Note exact leak location with photos or marking
- Pressure Testing: With system pressurized and controls centered, leaks intensify as system pressure increases—helping confirm the source
- Fluid Collection Method: Place clean cardboard or absorbent paper under the cylinder to distinguish between different leak sources
- Historical Pattern: Track leak progression—slowly increasing leaks suggest seal wear; sudden severe leaks indicate internal failure
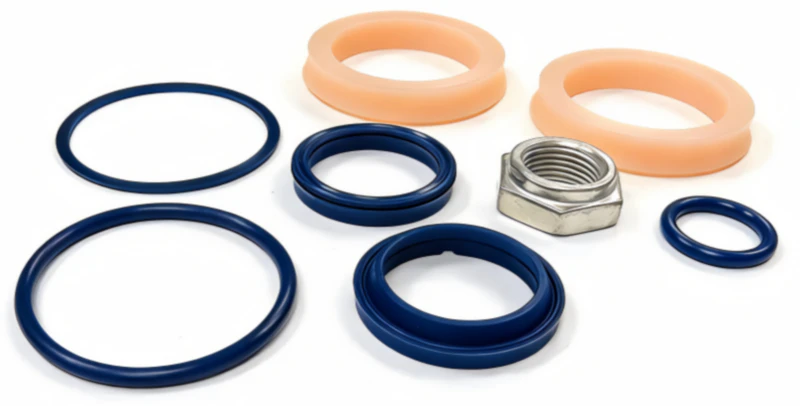
Understanding Hydraulic Seals: Types and Materials
Successful seal replacement begins with understanding seal types and materials. Different seals serve specific functions within a hydraulic cylinder, and selecting correct replacement seals ensures long-term leak prevention and proper system operation.
Rod Gland Seals (Primary External Seals)
Rod gland seals prevent hydraulic fluid from leaking past the piston rod where it exits the cylinder barrel. Typical rod gland assemblies include:
- Primary Seal (Wiper): Usually PTFE or elastomer, prevents contaminants from entering cylinder
- Secondary Seal (O-ring): Provides main fluid containment, typically nitrile or PTFE
- Wear Ring: Bronze or composite material that supports the rod and prevents galling
- Backup Rings: Support secondary seals under high pressure to prevent extrusion
Piston Seals (Internal Seals)
Piston seals divide the cylinder into two chambers, preventing hydraulic fluid from bypassing from one side to the other. Piston seal failure results in loss of directional control and pressure. Replacement piston seals typically come as complete assemblies including multiple o-rings and backup rings designed to work as an integrated system.
Material Selection for Different Environments
Seal materials must match your hydraulic fluid type and operating environment:
- Nitrile (NBR): Standard mineral oil applications, -40°F to +212°F temperature range, good cost/performance ratio
- PTFE (Teflon): Premium applications, excellent chemical resistance, lower friction than elastomers
- Polyurethane: Enhanced abrasion resistance, preferred for high-speed or dusty environments
- Viton (FKM): High-temperature or hazardous fluid applications, superior chemical compatibility
Step-by-Step Seal Replacement Procedure
Replacing tilt cylinder seals requires careful disassembly, meticulous cleanliness, and precise reassembly. Following this systematic procedure ensures your repaired cylinder functions as designed and prevents premature seal failure.
Step 1: Safety Preparation and Depressurization
Engage complete lockout procedures. Lower the mast fully, engage parking brake, and remove the ignition key. Wait 30 minutes for system pressure to dissipate completely. Pressure remaining in the cylinder can cause violent seal ejection during disassembly—never bypass depressurization procedures.
Step 2: Disconnect and Drain the Cylinder
Remove the cylinder from the forklift following the replacement procedures described previously. Position the cylinder vertically with the rod end pointing down, and drain all remaining hydraulic fluid into a clean container. Retain this fluid—it may be reused if filter analysis shows acceptable contamination levels.
Step 3: Remove the Rod Gland Assembly
The rod gland assembly threads into the cylinder end cap. Using an adjustable wrench or gland wrench sized for your cylinder, carefully turn counterclockwise to remove. Some glands are extremely tight after years of service—apply penetrating oil and allow 15 minutes before attempting removal. Once loose enough to turn by hand, carefully unscrew and extract the gland assembly.
Critical removal precautions:
- Protect the chrome-plated rod from damage—wrap it with cloth tape before clamping in a vise
- Support the rod end when removing the gland to prevent bending or scoring
- Place removed seals and components in a clean container to prevent contamination
- Document the exact order and orientation of seals as you remove them for correct reassembly
Step 4: Inspect Rod and Gland Assembly
Examine the rod for scoring, pitting, or corrosion. Minor surface imperfections can be polished smooth using 400-600 grit emery cloth. Deep scratches or pitting require rod replacement—seals cannot seal against damaged rod surfaces. Inspect the gland bore for corrosion or damage. Clean all components thoroughly with degreaser and lint-free cloths.
Step 5: Install New Seals
Installation order is critical. Seals must be installed in the exact sequence and orientation documented during removal. Lubricate new seals with clean hydraulic fluid before installation. Slide seals onto the rod carefully—never force or stretch seals excessively as this damages them immediately.
Seal installation sequence (from rod end outward):
- Wiper Seal: Installed first to contact the rod; beveled edge faces outward
- Backup Ring (if used): Supports primary seal; installed with specified orientation
- Primary O-ring Seal: Main fluid containment seal; ensure proper seating without twisting
- Wear Ring: Bronze bushing supporting rod; critical for preventing rod wear
- Gland Housing: Threaded assembly holding all seals in place
Step 6: Reinstall the Gland Assembly
Slide the rod back into the cylinder barrel slowly. Guide the gland assembly into the cylinder opening, then thread it clockwise. Start threading by hand to ensure threads engage correctly—cross-threading at this stage requires complete disassembly to repair. Once hand-tight, use the gland wrench to torque to manufacturer specifications, typically 150-250 ft-lbs depending on cylinder size.
Piston Seal Replacement: Internal Seal Services
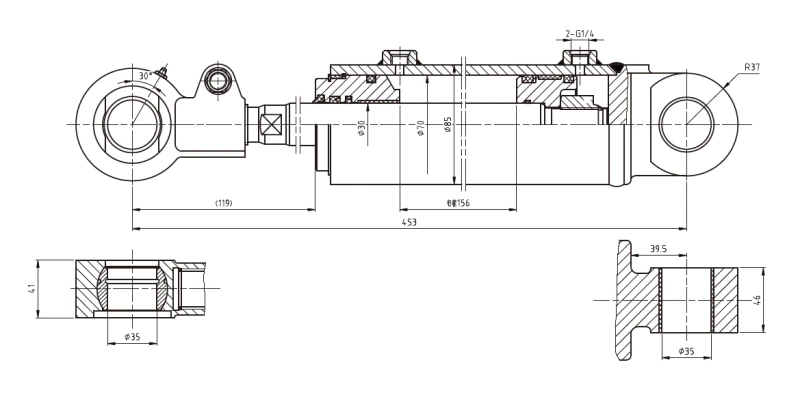
Piston seal replacement requires complete cylinder disassembly and is significantly more complex than rod gland seal replacement. This procedure is typically performed by professional hydraulic service centers equipped with specialized disassembly tools and pressure testing equipment.
When Piston Seal Replacement is Necessary
Piston seal failure manifests as rapid loss of directional control, sluggish response, or complete loss of tilt function despite adequate system pressure. Internal leaks bypassing the piston reduce pressure available to move the mast. Professional shops perform internal pressure testing to diagnose piston seal failure before disassembling the cylinder.
Professional Piston Seal Service
Because piston seal replacement involves complete disassembly, precision boring, and specialized pressure testing, most facilities outsource this service rather than performing it in-house. Professional service centers:
- Safely disassemble the cylinder using specialized tools preventing component damage
- Inspect barrel and piston bore for damage requiring honing or reboring
- Replace all seals, backup rings, and wear surfaces with OEM-specification components
- Pressure test the rebuilt cylinder to 150% of rated pressure before return
- Provide warranty protection on rebuilt cylinders
For comprehensive hydraulic service and professional piston seal replacement, contact our technical specialists who coordinate with certified service centers equipped with professional restoration capabilities.
Post-Repair Testing and Verification
After seal replacement, thorough testing confirms repairs are successful before returning the equipment to service.
Pressure Testing
Connect a hydraulic pressure gauge to the cylinder and operate the tilt function. Forward and backward tilt pressures should match specifications (typically 2,100-2,500 PSI). Significantly lower pressure indicates incomplete seal seating. Higher-than-normal pressure indicates a blocked port or valve restriction requiring investigation.
Leak Inspection
After reinstalling the cylinder on the forklift, operate the tilt function 10-15 times through complete motion. Inspect the rod gland area for any fluid weeping. Minor moisture at the rod can appear normal during initial operation as internal clearances stabilize. However, any visible dripping indicates incomplete seal seating and requires re-tightening the gland or potential seal replacement.
Load Test
Carefully operate the forklift under normal load through multiple tilt cycles. Verify smooth forward and backward tilt without hesitation. Confirm the mast holds position when controls are centered without drifting. Any performance degradation warrants additional investigation before full operational return.
Preventive Maintenance: Extending Seal Life
Seal failure is largely preventable through proactive maintenance practices. Most leaks result from neglected preventive care rather than component defects.
Seal-extending maintenance includes:
- Daily Rod Cleaning: Wipe the piston rod with a soft cloth to remove dust and debris that damages seals during rod travel
- Monthly Visual Inspection: Look for emerging leaks early when corrective action is simple and inexpensive
- Quarterly Hydraulic Filter Changes: Clean hydraulic fluid prevents contamination that accelerates seal wear
- Semi-Annual Fluid Analysis: Laboratory testing detects contamination and degradation before seal damage occurs
- Annual System Pressure Check: Verify system pressure remains within specifications—excessive pressure accelerates seal wear
Implementing these preventive measures extends seal service life from typical 3-5 years to 7-10 years or longer, dramatically reducing maintenance costs and equipment downtime.
Cost Analysis: Repair vs. Replacement
Before undertaking seal replacement, compare costs against cylinder replacement to make the most economical decision for your operation.
Typical seal replacement costs:
- Seal Kit (rod gland): $50-$150 depending on seal types
- Labor (in-house): 2-4 hours of technician time
- Professional Service: $300-$600 including disassembly, cleaning, inspection, and testing
- Total Rod Gland Seal Service: $350-$750
Typical cylinder replacement costs:
- New Cylinder: $600-$1,500
- Installation Labor: $300-$800
- Total Replacement: $900-$2,300
For rod gland seals, replacement typically costs 40-60% of cylinder replacement. Unless the cylinder barrel is scored or the rod is bent, seal replacement is economically superior and preserves your existing cylinder for future service.
Conclusion: Professional Leak Resolution
A leaking forklift tilt cylinder need not mean expensive equipment replacement. Through proper diagnosis, quality seal replacement, and preventive maintenance, you restore your cylinder to full functionality while extending its operational lifespan significantly. Whether performing repairs in-house or engaging professional hydraulic service providers, the key to success is systematic procedure adherence and precision throughout the repair process.
For expert diagnosis of cylinder leaks and professional seal replacement services, contact our hydraulic specialists who can assess your cylinder condition and recommend the most cost-effective repair solution for your fleet and operational requirements.
Expert Seal Replacement and Hydraulic Repair
Don’t let cylinder leaks compromise your material handling efficiency. Our certified technicians provide professional diagnosis, quality seal replacement, and complete pressure testing to restore your equipment to factory performance standards.
Get Professional Service: Schedule a hydraulic system inspection today and discover how professional seal replacement can save thousands compared to complete cylinder replacement.