.webp)
Overview: When and Why You Need Tilt Cylinder Replacement
Meta Description: Learn how to replace a forklift tilt cylinder with our complete step-by-step guide. Includes safety procedures, tools needed, and professional installation tips for double-acting hydraulic cylinders.
A worn or damaged forklift tilt cylinder significantly impacts equipment performance and safety. Whether your cylinder is leaking, unresponsive, or drifting, replacement is often more cost-effective than rebuilding. This comprehensive guide walks through the entire replacement process, from pre-removal inspection to post-installation testing and calibration.
Proper tilt cylinder replacement requires careful planning, correct tools, and understanding of hydraulic system principles. Rushing the replacement or skipping critical steps can result in poor performance, leaks, or safety hazards. Our step-by-step approach ensures your new cylinder functions optimally from day one.
Whether you’re managing a fleet of 5 forklifts or 500, knowing how to execute a professional cylinder replacement saves time, reduces downtime, and extends your equipment’s operational lifespan.
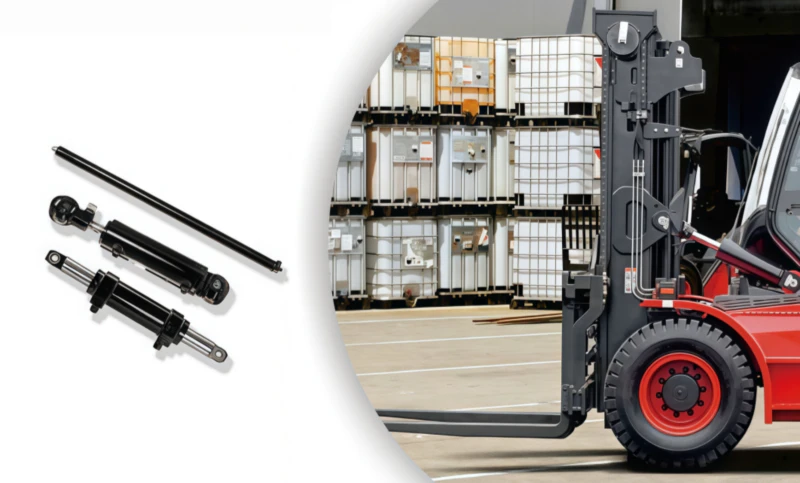
Pre-Replacement Planning: Assessment and Preparation
Before beginning tilt cylinder replacement, conduct a thorough inspection of the existing cylinder and document its specifications. This critical planning phase prevents ordering incompatible parts and identifies underlying system issues that may have caused the original cylinder failure.
Documenting Original Cylinder Specifications
Before removal, measure and record these specifications:
- Bore Diameter: Measure the cylinder barrel—typically 2.5″ to 5″ for forklift tilt cylinders
- Rod Diameter: Measure the piston rod—usually 1.5″ to 3″
- Stroke Length: Measure from fully retracted to fully extended position—standard 8-16 inches for tilt cylinders
- Port Thread Size: Identify inlet/outlet port specifications—usually SAE or ISO thread standards
- Mounting Configuration: Document mounting type—clevis, flange, trunnion, or custom brackets
- Pressure Rating: Check cylinder nameplate for maximum operating pressure
Gathering Required Tools and Materials
Proper tool preparation prevents delays and complications during cylinder replacement:
- Hydraulic Jacks/Lifts: Support forklift mast safely during cylinder removal—minimum 2-ton capacity
- Socket Set and Wrenches: SAE and metric sizes from 10mm to 1-1/2″ for mounting bolts
- Hydraulic Fluid Container: 5-gallon drain pan and clean containers for fluid collection
- Gaskets and Seals: Replacement o-rings, port seals, and pressure hose end connectors
- Thread Sealant: Hydraulic-grade thread sealant (Teflon tape or pipe dope) for port connections
- Pressure Test Equipment: Hydraulic pressure gauges and portable test kit for post-installation verification
- Cleaning Supplies: Lint-free rags, degreaser, and clean hydraulic fluid for system flushing
- Safety Equipment: Work gloves, safety glasses, and absorbent material for fluid spills
Step-by-Step Removal Procedure
Removing the old hydraulic cylinder requires careful procedure to prevent contamination of the hydraulic system and damage to surrounding components. Follow this systematic approach to ensure safe, clean removal.
Step 1: Safety Lockout and System Depressurization
Always begin with complete safety lockout. Engage the forklift parking brake, remove the ignition key, and activate the lockout tag. Lower the mast fully and engage the load-holding mechanism to prevent accidental descent. This critical safety step prevents equipment movement during maintenance and protects technicians from high-pressure hydraulic exposure.
Step 2: Access the Cylinder Mounting Points
Support the mast assembly with hydraulic jacks at safe points before loosening any bolts. Secure the mast height to prevent unexpected descent. Remove any shrouds, guards, or cosmetic panels blocking access to cylinder mounting bolts. Document the exact position of all components with photos before beginning disconnection—this visual record aids reassembly and helps identify issues later.
Step 3: Disconnect Hydraulic Hoses
Position the drain pan under both cylinder ports. Using the appropriate wrench size, carefully loosen the inlet and outlet port fittings. Hydraulic fluid may continue draining even after loosening—allow 15-30 minutes for complete drainage. Remove hose end connectors slowly to minimize spillage. Immediately cap or plug open hose ports to prevent hydraulic fluid contamination from dust and debris.
Critical hose disconnection best practices:
- Use a second wrench on the port fitting to prevent round-off damage
- Never force stuck fittings—apply penetrating oil and wait 15 minutes
- Capture all spilled fluid in the drain pan for proper disposal
- Label hoses to ensure correct reconnection to corresponding ports
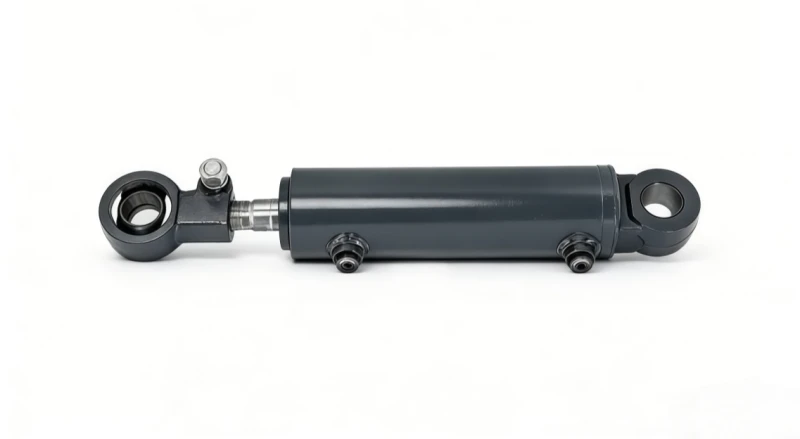
Step 4: Remove Mounting Hardware
With hydraulic hoses safely disconnected and capped, remove the mounting bolts connecting the cylinder to the mast and chassis. Most forklift tilt cylinders use 4-6 bolts (typically 1/2″ to 5/8″ diameter). Place all bolts, washers, and hardware in a labeled container to prevent loss. Inspect bolt holes for damage or cross-threading—any damage requires attention before installing the new cylinder.
Step 5: Carefully Extract the Old Cylinder
With all connections removed, carefully withdraw the old cylinder. Two people should perform this operation—one supporting each end. Slowly lower the cylinder to the work bench or ground. Inspect the cylinder barrel for scoring, cracks, or deformation that might indicate system problems requiring investigation before installing the replacement.
Preparation of New Cylinder and Components
Before installing the new tilt cylinder, proper preparation ensures contamination-free operation and long service life. This preparation phase is often overlooked but dramatically impacts cylinder reliability.
Cylinder Inspection and Flushing
New cylinders may contain manufacturing debris—metal particles, sand from casting, oil residue. Flush the cylinder internally by cycling clean hydraulic fluid through the ports using a portable hand pump. Continue flushing until the discharge fluid appears clean and debris-free. This preventive step eliminates seal-damaging contamination that could cause premature failure.
Port Preparation and Thread Sealing
Apply hydraulic-grade thread sealant to all port fittings using Teflon tape or pipe dope specifically formulated for hydraulic applications. Wind Teflon tape clockwise around male threads 3-4 times, ensuring complete coverage without overlap. This sealant prevents micro-leaks at port connections and maintains system integrity under high pressure.
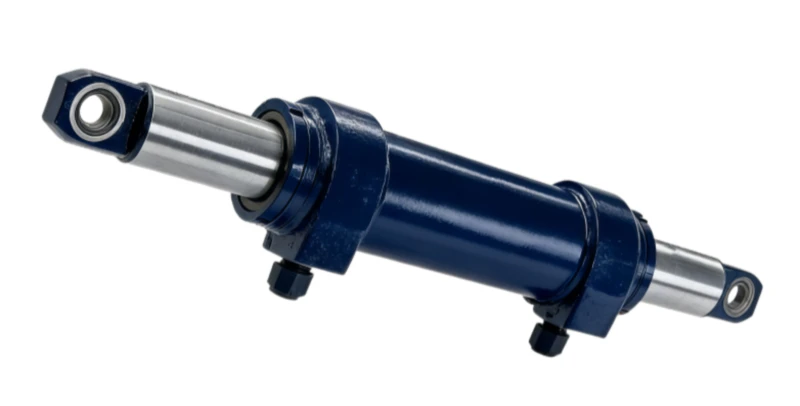
Step-by-Step Installation Procedure
Installing the new cylinder follows the reverse sequence of removal. Precision and attention to detail during installation determines whether your replacement cylinder achieves its full service life or encounters premature problems.
Step 1: Position and Mount the New Cylinder
Carefully position the new cylinder to align with mounting holes. Support the mast at the correct height using hydraulic jacks so mounting flanges align naturally without forcing. Install mounting bolts hand-tight first—do not fully torque until all bolts are seated. Once all bolts are hand-tight, torque them to manufacturer specifications in a star pattern (diagonal sequence) to ensure even pressure distribution.
Typical torque specifications for mounting bolts:
- 1/2″ Grade 8 bolts: 90-110 ft-lbs
- 5/8″ Grade 8 bolts: 140-160 ft-lbs
- 3/4″ Grade 8 bolts: 200-230 ft-lbs
Step 2: Connect Hydraulic Hoses
Reconnect the inlet and outlet hoses to their corresponding ports. Use the hose labels created during removal to ensure correct connections—reversed inlet/outlet connections cause reverse operation and can damage the directional control valve. Hand-tighten each connection first, then use wrenches to torque fittings to proper specifications.
Hose connection best practices:
- Use two wrenches—one on the port, one on the hose fitting—to prevent damage
- Inspect hoses for cracks or deterioration; replace if any damage is visible
- Verify all connections are tight before pressurizing the system
- Route hoses to prevent abrasion against sharp edges or moving parts
Step 3: System Flushing and Fluid Check
Before operating the tilt function, flush the entire hydraulic circuit to remove any contamination introduced during cylinder replacement. Operate the tilt function slowly 5-10 times through partial motion, allowing the system to purge air and circulate clean fluid. Check hydraulic fluid level in the reservoir and top up with the specified hydraulic fluid if necessary.
Step 4: Function Testing and Calibration
Carefully operate the new cylinder through its full range of motion. Forward and backward tilt should be smooth and responsive without jerky motion or delays. Monitor for any visible leaks at hose connections or port fittings. Test load stability—the mast should hold position when controls are centered without drifting forward or backward.
Pressure testing should verify:
- Tilt Forward Pressure: Typically 2,100-2,500 PSI under load
- Tilt Backward Pressure: Similar pressure range for balanced cylinder design
- Load Holding: Pressure should remain stable with controls centered; no drift after 1-2 minutes
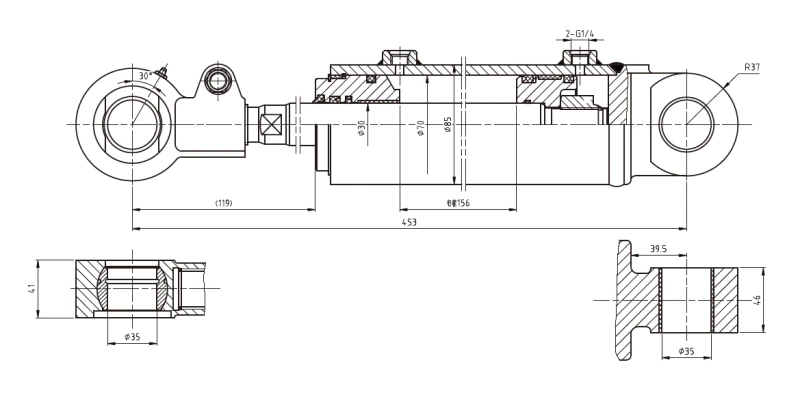
Post-Installation Verification and Troubleshooting
After completing the installation, thorough verification ensures your new tilt cylinder replacement operates correctly and that no installation errors compromise performance or safety.
Common Installation Issues and Solutions
Slow or Sluggish Tilt Response: Air pockets remaining in the cylinder cause sluggish operation. Cycle the tilt function 10-15 times through complete motion to purge air. If slowness persists, check hydraulic pump output pressure with a gauge—inadequate pressure indicates system problems requiring diagnostic investigation.
Reverse Tilt Motion: Reversed inlet/outlet connections cause the mast to tilt backward when the control calls for forward tilt. Stop operation immediately and swap the hose connections. Verify correct operation before allowing equipment to resume service.
Hose or Port Leaks: Minor weeping at hose fittings often resolves after 5-10 minutes as system pressure stabilizes. If leaking continues, loosen the fitting slightly and retorque to specification using two wrenches. Never over-tighten—this damages port threads and worsens leaking.
Mast Drift (Slow Loss of Position): New cylinders should hold position indefinitely. Drift indicates the pilot-operated check valve requires pilot pressure to function correctly. Verify that pilot ports are connected properly if your system design includes pilot lines. Contact the cylinder manufacturer if drift persists.
Documentation and Record Keeping
Document the cylinder replacement including:
- Replacement date and equipment serial number
- Cylinder model and serial number from manufacturer nameplate
- Hydraulic fluid drained and type/grade used for refill
- Pressure readings at installation testing
- Technician name and certification level
- Any issues encountered and resolutions applied
Maintaining detailed replacement records helps identify system trends—if cylinders fail prematurely, records may reveal contributing factors like contaminated hydraulic fluid or inadequate maintenance intervals.
Professional Installation vs. DIY Replacement
While DIY replacement is possible for experienced technicians, professional installation offers advantages worth considering. Certified technicians bring specialized pressure testing equipment, extensive troubleshooting experience, and manufacturer-specific knowledge that reduces installation errors and ensures optimal performance.
DIY replacement requires:
- Substantial technical knowledge of hydraulic systems
- Specialized tools—pressure gauges, torque wrenches, hose fittings
- Several hours of labor in confined spaces
- Risk of installation errors that cause equipment downtime
Professional installation ensures:
- Proper system flushing eliminating contamination risk
- Pressure testing and performance verification
- Warranty protection on both parts and labor
- Minimal downtime with experienced technician efficiency
Cost Considerations and ROI
Cylinder replacement costs vary significantly based on cylinder type, forklift capacity, and whether professional service is utilized. Understanding cost factors helps budget effectively for equipment maintenance.
Typical cost breakdowns:
- Cylinder Component: $400-$1,200 depending on bore size and pressure rating
- Professional Installation: $300-$800 for labor, testing, and system verification
- Hydraulic Fluid (if system flush needed): $50-$150 depending on reservoir capacity
- Additional Parts (seals, hoses, fittings): $50-$200
Total replacement cost typically ranges $800-$2,200, depending on complexity. This compares favorably to equipment downtime costs, which can exceed $5,000 per day for inactive forklifts in high-volume operations. Professional installation protects this investment by ensuring long-term reliability.
Preventing Future Cylinder Failures
Understanding why your cylinder failed helps prevent recurrence. Common failure modes include hydraulic contamination, seal wear from inadequate maintenance, and operating pressure exceeding cylinder design limits. For comprehensive maintenance guidance that extends cylinder service life, consult our technical team about preventive maintenance programs specifically tailored to your equipment and operational demands.
Preventive measures include:
- Monthly visual inspections for leaks, scoring, or seal degradation
- Quarterly hydraulic fluid analysis to detect contamination before damage occurs
- Annual hydraulic filter replacement—clean filters prevent seal-damaging contaminants
- Regular rod cleaning to prevent debris from damaging seals during operation
Conclusion: Expert Guidance for Successful Replacement
Successful forklift tilt cylinder replacement demands careful planning, proper tools, and methodical execution. Whether you perform replacement yourself or engage professional technicians, the systematic approach outlined in this guide ensures installation success and long-term cylinder reliability.
Your new hydraulic cylinder represents a significant investment in equipment performance and safety. Taking time to execute installation correctly protects that investment and ensures your forklift fleet operates reliably for years to come. Need expert guidance on cylinder selection, installation, or post-replacement maintenance? Our technical specialists are ready to assist with your complete hydraulic system needs.
Ready to schedule your tilt cylinder replacement with professional installation? Our certified technicians provide comprehensive support from cylinder selection through post-installation verification and training. Contact our team today for competitive pricing and expert service that keeps your material handling equipment operating at peak performance.
Professional Tilt Cylinder Replacement Services
Don’t let equipment downtime interrupt your operations. Our expert technicians handle complete tilt cylinder replacement from assessment through full system testing. With certified professionals, proper diagnostic tools, and quality replacement components, we ensure your forklift returns to reliable service quickly.
Schedule Service Now: Contact our technical team for fast, professional cylinder replacement with warranty protection and post-installation support.